
HealthSherpa Agent Portal Explained: How to Streamline Your Medicare Enrollments
Quick Answer
Use the HealthSherpa Medicare Agent Portal to:
Compare Medicare Advantage, Part D, Medicare Supplement, and Special Needs Plans.
Review drug, pharmacy, provider, and benefit information.
Complete electronic enrollments.
Capture beneficiary signatures by text, email, voice, or in person.
Track contacts and enrollment history.
Reduce duplicate data entry during AEP.
Download application records.
Monitor carrier processing.
Treat the portal as an enrollment and workflow tool. Do not treat it as a replacement for licensing, certifications, carrier appointments, Ready-to-Sell status, Scope of Appointment procedures, or current CMS and carrier requirements.
What the HealthSherpa Agent Portal Does
HealthSherpa for Medicare is a separate platform from the HealthSherpa ACA enrollment portal.
Use the HealthSherpa Medicare platform to shop, enroll, and track Medicare clients. Use the ACA platform for Affordable Care Act marketplace business.
Access both platforms through the HealthSherpa dashboard:
Open the HealthSherpa ACA dashboard.
Select the Candy box icon in the upper-right corner.
Select HealthSherpa for Medicare.
Create a Medicare account or log in to an existing account.
Review the official HealthSherpa platform instructions before AEP begins.
HealthSherpa describes its Medicare platform as:
Upline-neutral.
Multi-carrier.
Free for agents and agencies.
Connected to carrier Ready-to-Sell data.
Built with client management tools.
Complete Setup Before AEP
Set up the portal before October 15, 2026. The 2026 AEP supports coverage changes for the 2027 plan year.
Complete these steps:
Confirm Your Credentials
Verify each item before quoting or enrolling:
Active state insurance licenses.
Required Medicare certifications.
Carrier appointments.
Carrier contracting.
Product-specific certifications.
Current Ready-to-Sell status.
Correct NPN.
Correct carrier writing numbers, agent IDs, or equivalent identifiers.
HealthSherpa only displays enrollment options for carriers, products, states, and plan years connected to your Ready-to-Sell status.
Resolve missing carrier access before client appointments. Contact the carrier or HealthSherpa Medicare support when a contracted carrier does not appear correctly.
Build Client Profiles
Create or update each client’s Contact Profile.
Enter:
Legal name.
Date of birth.
Medicare Beneficiary Identifier.
Address.
County.
Contact information.
Current coverage.
Prescription drugs.
Preferred pharmacies.
Physicians and facilities.
Care priorities.
Enrollment period information.
Correct this information before comparing plans. Incorrect names, dates of birth, Medicare numbers, or addresses can create carrier processing delays.
Compare Plans Efficiently
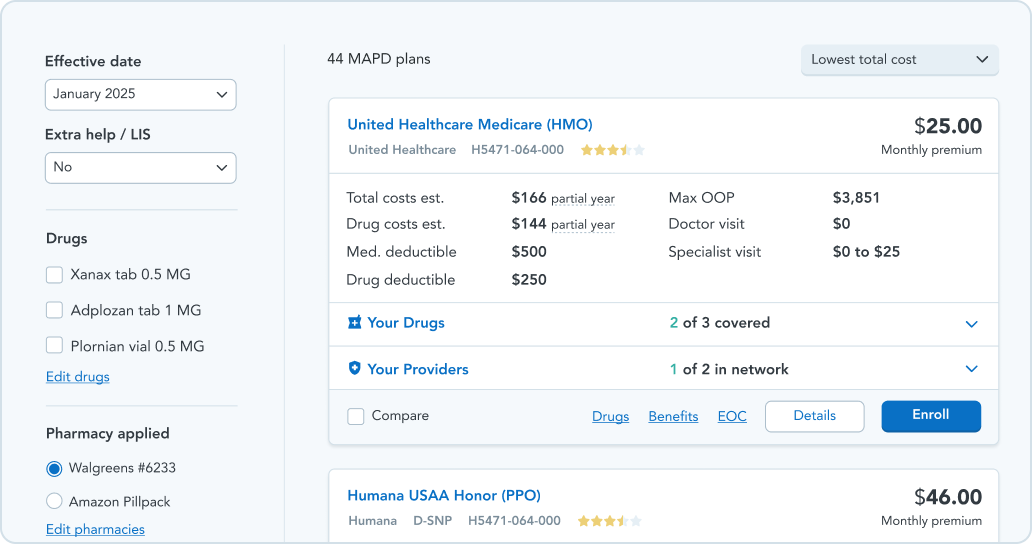
Start every recommendation with the client’s requirements.
Use the portal to review:
Monthly premiums.
Medical deductibles.
Maximum out-of-pocket costs.
Primary care and specialist costs.
Hospital costs.
Prescription drug costs.
Pharmacy tiers.
Provider network status.
Service area.
Dental, vision, hearing, transportation, and other supplemental benefits.
Plan type.
Enrollment eligibility.
Special Needs Plan requirements.
HealthSherpa supports plan shopping across multiple Medicare product categories. Its official materials identify MAPD, MA, Part D, Supplement, and SNP plan shopping.
Use filters to reduce the plan list. Do not select a plan based only on premium.
Verify Prescriptions
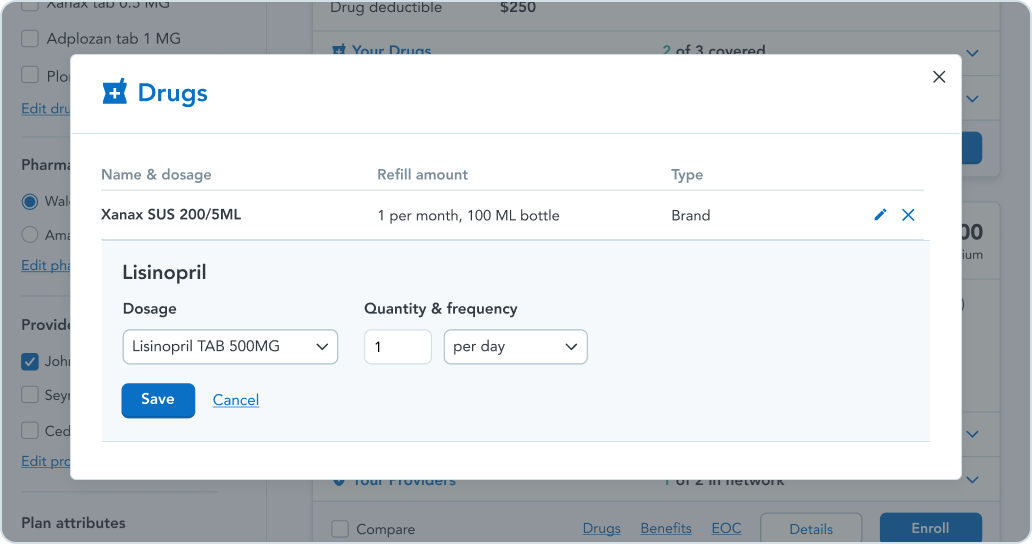
Load the client’s current prescriptions.
Check:
Drug name.
Dosage.
Quantity.
Refill frequency.
Preferred pharmacy.
Estimated annual drug cost.
Formulary status.
Coverage restrictions.
Confirm the result with current carrier materials and the client’s information. Drug formularies and pharmacy networks can change for the new plan year.
Verify Providers
Search the client’s physicians, specialists, hospitals, and preferred facilities.
Confirm:
Provider network status.
Facility network status.
Primary care requirements.
Referral requirements.
County availability.
Plan-specific network limitations.
Document the client’s providers and the date of verification. Tell the client that provider participation can change.
Complete the Enrollment
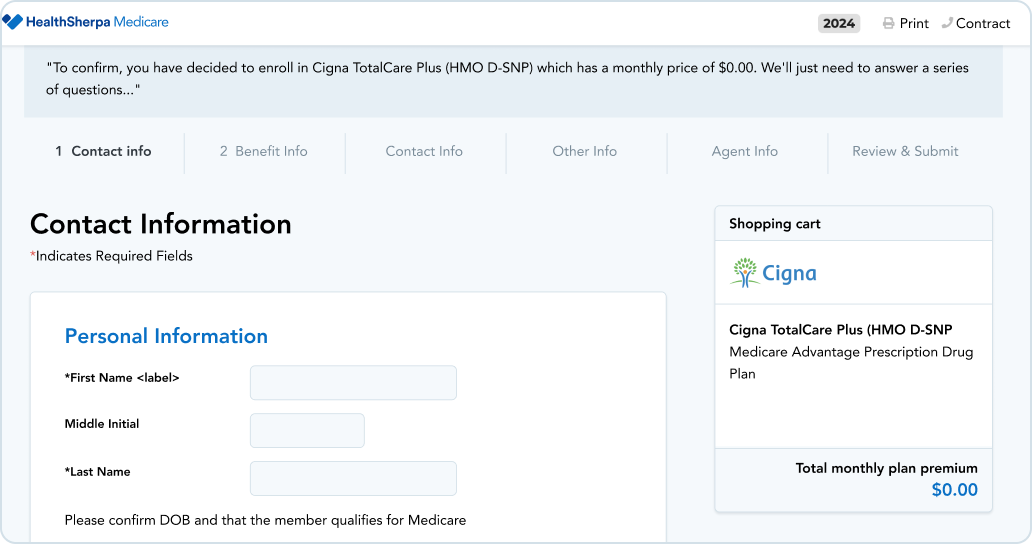
Select the plan. Click Enroll.
Use the pre-filled form generated from the client’s Contact Profile. Review every field before submitting.
Choose the correct signature method:
Voice Signature: Use during a recorded call when the client provides consent through the applicable voice-signature process.
eSignature: Complete the form, then send the client a secure link by email or text.
In-person signature: Complete the form with the beneficiary present and collect the required signature.
Follow the current carrier and CMS rules for call recording, consent, Scope of Appointment documentation, and signatures. Review HealthSherpa’s enrollment overview for platform-specific instructions.
Before submitting:
Confirm the enrollment period.
Confirm the requested effective date.
Verify the Medicare number.
Verify the client’s address.
Review plan selection.
Review drug and provider information.
Confirm required questions.
Confirm your NPN.
Confirm your writing number or carrier identifier.
Confirm required disclosures and signatures.
Submit the application directly to the carrier through the integrated enrollment process.
Track Every AEP Enrollment
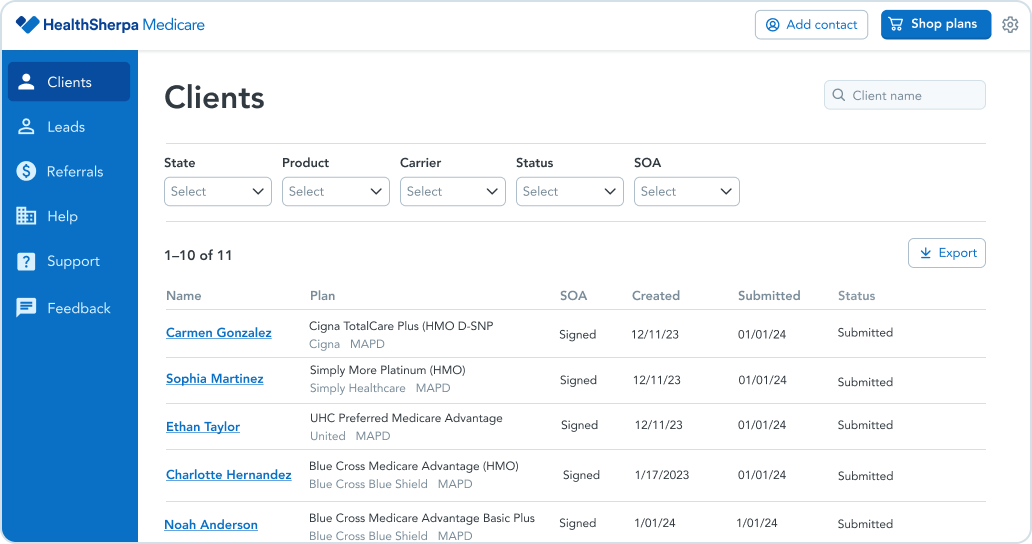
After submission, HealthSherpa states that:
The enrollment is sent to the carrier with your NPN and writing number.
Enrollment information is added to the client’s Contact Profile.
The application generally appears in the carrier broker portal within three to seven business days.
Carrier processing may take longer during AEP.
Use the portal and carrier broker portals together.
Track:
Submission date.
Confirmation number.
Carrier.
Plan.
Effective date.
Enrollment period.
Application status.
Requests for information.
Client communication.
Follow-up date.
Download the application PDF immediately after submission. HealthSherpa notes that access may not remain available if the plan is suppressed or your Ready-to-Sell status changes.
Send the client a confirmation message. Explain what happens next and provide a direct contact method for questions.
Resume Incomplete Applications
Resume an unfinished enrollment from the client’s Contact Profile.
Open the Contact Profile.
Find the enrollment card.
Select Resume.
Open the plan details.
Select Enroll.
Continue the pre-filled application.
Use this process when a client needs additional time to review the plan or complete the signature.
Do not create unnecessary duplicate applications. If a correction requires a new submission, follow the HealthSherpa workaround or submit through the carrier site. Add the enrollment record manually afterward when required to keep your CRM accurate.
Apply a Compliance Workflow
HealthSherpa insurance tools can standardize parts of the enrollment process. They cannot make an agent compliant automatically.
Use this AEP compliance checklist:
Before the Appointment
Confirm license status.
Confirm certification status.
Confirm carrier appointment.
Confirm Ready-to-Sell status.
Complete the required Scope of Appointment process.
Use current carrier-approved materials.
Review the client’s existing plan and Annual Notice of Change.
Confirm the appointment’s permitted product scope.
During the Appointment
Discuss only the products within the documented scope.
Use accurate plan information.
Compare costs, benefits, networks, and limitations.
Avoid guarantees.
Avoid unsupported savings claims.
Explain plan restrictions.
Verify the client’s needs before recommending coverage.
Follow call-recording requirements.
Capture the correct signature method.
After Submission
Save the application PDF.
Save required consent and Scope of Appointment records.
Record the confirmation number.
Update the client’s profile.
Set a carrier follow-up date.
Respond to carrier requests for information.
Confirm the final enrollment status.
Document client communications.
Review current Medicare.gov enrollment guidance and current carrier instructions before AEP.
Use HealthSherpa With Your Agent Support System
A portal improves speed. A complete agent process improves consistency.
Combine HealthSherpa with:
Carrier training.
A CRM or agency management system.
AEP client review campaigns.
Compliance document storage.
Carrier update monitoring.
Follow-up automation.
Dedicated agent support.
Advocate Financial helps independent agents prepare for AEP with carrier access, technology, training, and business development support. Review the Medicare agent AEP checklist, monitor 2027 Medicare Advantage carrier updates, and contact Advocate Financial for agent support.
AEP Preparation Timeline
Now Through September
Complete certifications.
Confirm carrier appointments.
Verify Ready-to-Sell status.
Clean client records.
Request prescriptions and provider lists.
Review carrier updates.
Test portal access.
Practice the enrollment workflow.
October 1 Through October 14
Review approved marketing materials.
Schedule client appointments.
Prepare plan comparison procedures.
Confirm AEP documentation.
Organize follow-up lists.
Avoid submitting AEP applications before the permitted enrollment date.
October 15 Through December 7
Complete compliant plan reviews.
Compare current and upcoming coverage.
Verify prescriptions and providers.
Submit accurate applications.
Download application PDFs.
Track carrier confirmations.
Follow up on delayed or incomplete enrollments.
Final Checklist
Use the HealthSherpa agent portal to centralize Medicare plan shopping, enrollment, and client records.
Complete these actions before each submission:
Verify client data.
Confirm plan availability.
Check drugs and pharmacies.
Check providers and facilities.
Confirm enrollment eligibility.
Confirm RTS status.
Select the correct signature method.
Review the complete application.
Submit through the approved workflow.
Download the application PDF.
Track carrier processing.
Document follow-up.
Use current HealthSherpa, CMS, Medicare.gov, and carrier guidance. Confirm requirements before acting.
Social Media Posts
Prepare for the 2026 Medicare AEP with a more organized enrollment workflow. Learn how the HealthSherpa agent portal helps independent agents compare plans, verify prescriptions and providers, submit applications, manage client records, and track follow-up.
Read the full guide: Advocate Financial Blog
The HealthSherpa agent portal can help simplify Medicare enrollments during AEP. Review the setup process, plan comparison tools, signature options, client tracking features, and compliance checkpoints before October 15.
Read the guide: Advocate Financial Blog
Comments